Last year my family was so excited for Back to the Future Day on October 21! Not only did we celebrate the day by creating a Back to the Future DeLorean stroller for my toddler, but we decided to dress up (well three of us did), as Back to the Future characters for Halloween as well. Obviously we are huge Back to the Future fans in my family. Our costumes included the DeLorean stroller, Marty McFly with a custom hoverboard, Doc Brown, and Doc's dog Einstein. I even was able to hookup blue LED lights on the stroller for time travel effects!

Scroll down to see inside my DeLorean stroller project, our Halloween costumes, and also see the details that makes this so fun. For the main materials I used PVC pipe, cardboard, our Britax B-Agile stroller, lots of grey and black duct tape, black and grey spray paint, heating vents, battery powered string LED lights, and some old parts off of a broken ride-on toy we had.

Not only did I build the DeLorean stroller, but I also customized my own hoverboard and Pepsi Perfect bottle. You can't have Back to the Future without those! I took a stock prop hoverboard and had my own circle Mattel stickers printed. Then I cut out some foam pieces to match the battery pack of the original. For the Pepsi Perfect bottle I took an old water bottle, spray painted it, and added the decal (bought from ebay) and silver line sticker.

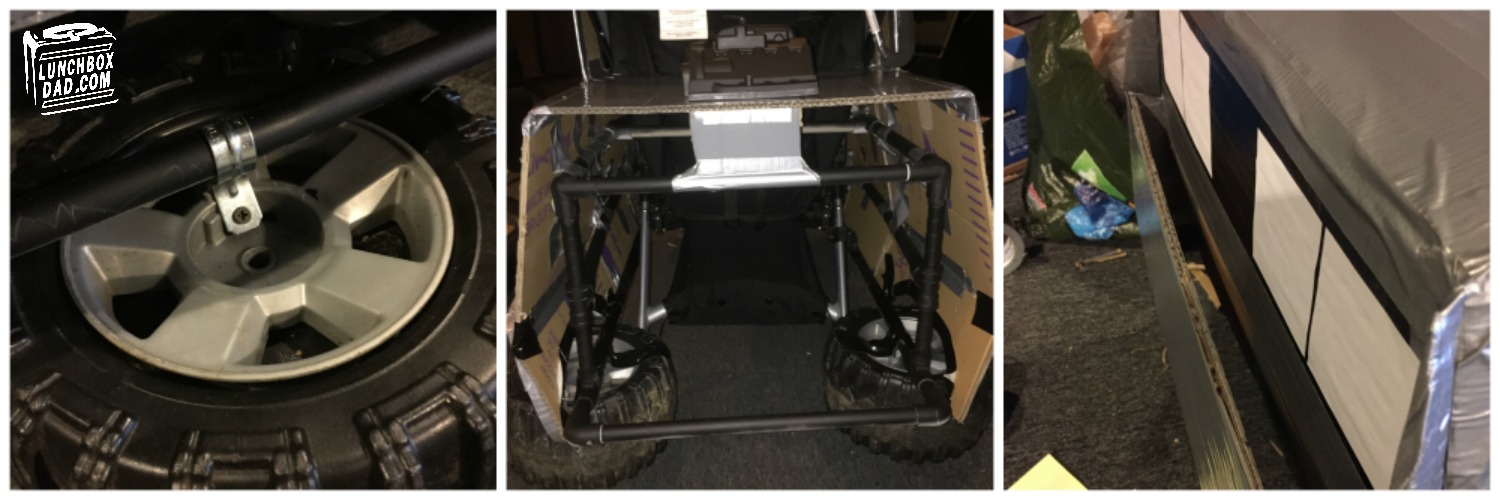
I knew I wanted to build the DeLorean out of card board but I also knew that I needed a lightweight frame to put it on. PVC pipe would work well because it is light, but also flexible. I spray painted it black so that you couldn't see any of the pieces once assembled. I also cut and spray painted the cardboard grey. This material was great because it was easy to cut and forgiving on the seams. I used grey duct tape to attach the pieces together.

Here are some more shots of the DeLorean being put together. I pulled the plastic wheels, engine cover, and rear view mirrors from my kids' old broken ride on toy. I reinforced the back end because the weight was going to be too much for the cardboard alone. On a few of the areas, like the bumpers, I just attached duct tape to fill in the gaps. That was much easier than fashioning a whole piece to fit.

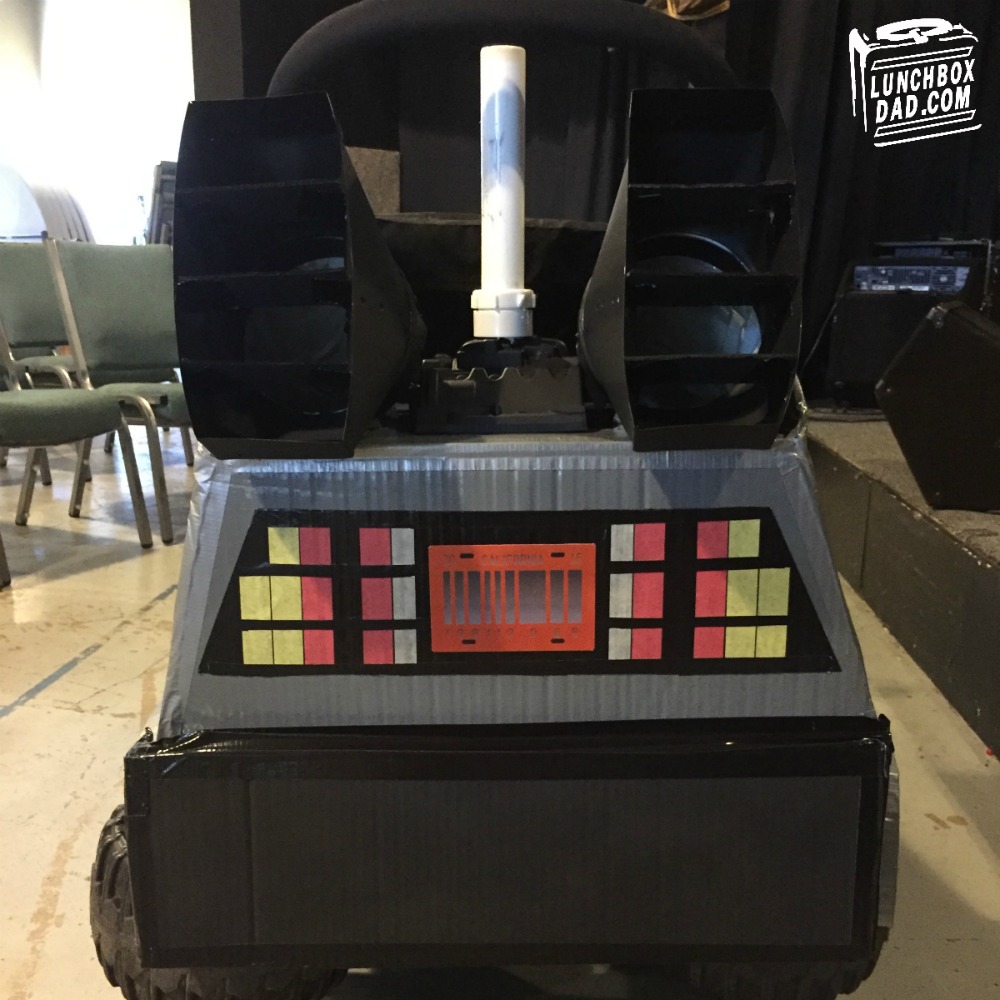
I hand drew the DeLorean emblem on the front with sharpie marker. I found pictures online of the 2015 license plate, flux capacitor, and time circuits. I printed them out and cut them to fit where needed. I used white battery powered led string lights to really bring the Flux Capacitor to life. They blink like it is actually "fluxing." I chose the 2015 license plate because, while the "outatime" plate from 1985 is iconic, it was only in one scene and the famous flying DeLorean (which this is) only had the orange plate installed. I used yellow, red, and white masking tape to create the tail lights.

Here are some more shots of the blue battery powered string lights. They really brought attention to the costumes when it turned dark on Halloween. People were stopping to take pictures wherever we went. I bought them off online for about $7 each.

For the rear end, I used floor heating ducts and spray painted them black. For Mr. Fusion I bought a plastic pipe and drilled a hole through the plastic engine cover from the ride-on toy. I just inserted the pipe through the hole and it stays because it is a snug fit.

I hope you had fun checking out our Halloween costume project and please make sure to share it with your friends! Maybe it will even inspire you to create your own Back to the Future Halloween!
This post comes from the TODAY Parenting Team community, where all members are welcome to post and discuss parenting solutions. Learn more and join us! Because we're all in this together.
