
When we come into a client’s home we try to get the sense of how they are functioning in the space so that we can enhance their current living situation. In many cases, clients are so used to living with their current setup that they aren’t able to visualize any other solution. Having fresh eyes take a look at your space often allows new ideas to be suggested. Also, having someone else take a look at your problem area can help them get a sense of why the setup isn’t working for you, which can be difficult to explain unless the person seese/experiences it firsthand.
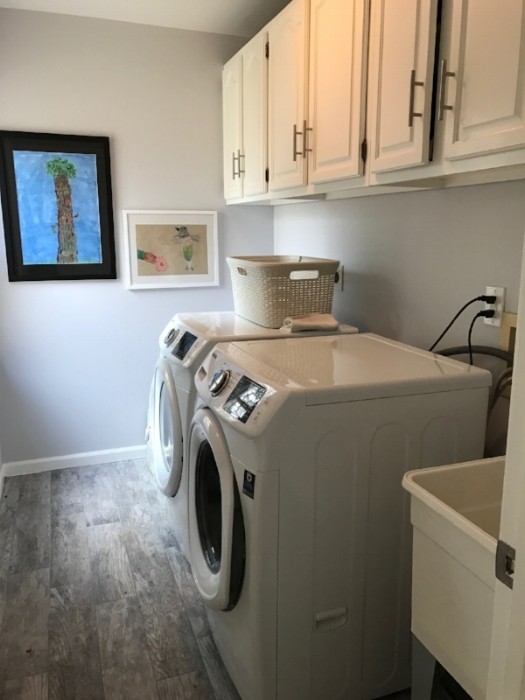
We worked on a multi-room organization project for a family, and one of their pain points was their laundry room. The room itself was nice in that there was storage, but the cabinets were located high on the wall which wasn’t doing the family many favors because they were difficult to reach and made it tough to pull down (and put away) the items that were stored inside. After checking out the space for ourselves, we understood the issues that the family was facing:
- Visibility. Knowing that moving the cabinets lower on the wall was not an option, we needed to find a way that made the cabinet shelving function better. Our clients knew that certain items were in the cabinets, but didn’t know exactly where to find them because there was no way to see what was stored where.
- Accessibility. Since the cabinets are high on the wall and the washer and dryer units are in front of them, if an item was tucked in the back of the cabinet (or if it fell and rolled out of place) there was no easy way to see where it went. Also, the existing organizing products did not fit the space very well so items were becoming stacked on one another which made it impossible to grab without creating a bigger mess.
Here is a “BEFORE” of Cabinet 1 and Cabinet 2:

Before: Cabinet 1

Before: Cabinet 2
HOW TO ORGANIZE MULTI-PURPOSE CABINETS
Our Approach
1. Pull everything out and categorize. Knowing that this was the area in their home where they stored their utility, dog-related, and laundry items, it was important for us to see exactly what they had (and how much of each category).
2. Measure the space. We measured the available, usable space for each shelf (Length x Width x Height) so that when it came to choosing products we would know what could fit in the space. We also took note of the adjustable shelving which could play in our favor in case we needed to account for taller items on the shelves.
3. Place the categories back in the cabinet. Now that we knew what items and categories we were working with, we placed everything in the cabinet in an orderly way separated by category. This helped us visualize what type of products would be necessary to keep the categories corralled and accessible.
Here is an “PROGRESS” shot of Cabinet 1 and Cabinet 2 after all of the contents were categorized:

PROGRESS: Cabinet 1

PROGRESS: Cabinet 2
4. Choose products that are easy to use and would make the space more functional. We’ve mentioned it before: always measure before choosing products! Knowing the usable area of space that you have to work with (and taking into account any interruptions to your space, like the vertical wooden divider at the front of the cabinets) will make your product selection easier and more accurate. For this client, we needed options that not only fit the dimensions of each cabinet shelf, but that were also easy to grab. We opted for bins with high edges (to avoid contents tipping over the side or back) and bins with a lip or handle that made it possible to pull the entire category down from the shelf.
5. Add labels to maintain categorization. We added simple labels to each of the products to identify each category. Labels take out the guesswork and frustration that often comes from searching for something that you know you have, but don’t know where it’s located.
And here's the final AFTER of the cabinets:
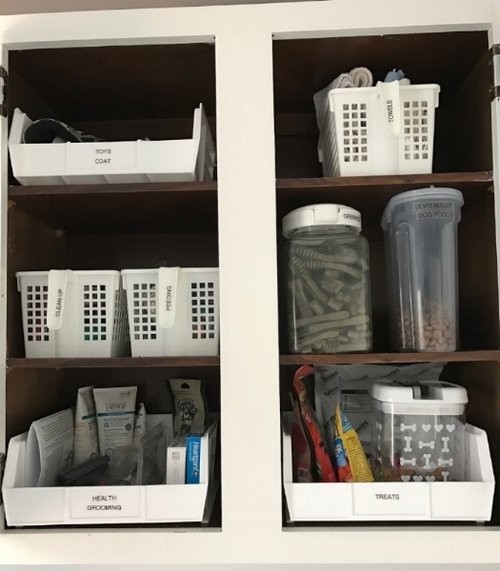
AFTER: Cabinet 1

AFTER: Cabinet 2
We’d love to know: are there any tricky cabinets or hard-to-access areas of your home that have left you stumped on how to organize?
This post comes from the TODAY Parenting Team community, where all members are welcome to post and discuss parenting solutions. Learn more and join us! Because we're all in this together.