For more on this topic, check out the full Happy Holidays collection
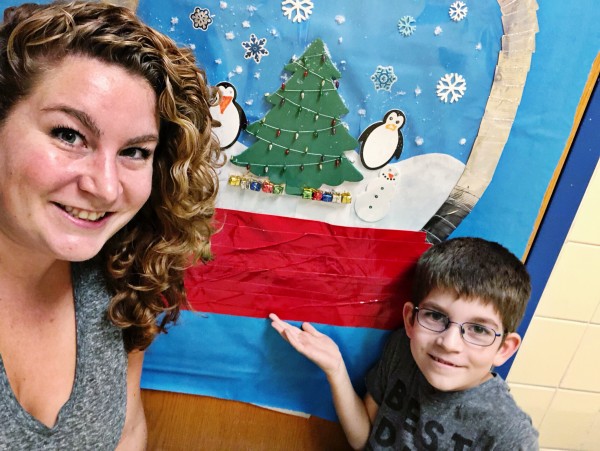
Each year, my son's school puts out an email asking if anyone wants to decorate the classroom doors for the holidays. Families get to come in in the evening, use some school-provided background paper, & get to work! My son & I did it this year for the first time & had so much fun together :)
I was searching for ideas on Pinterest (of course), & I came across the idea of doing a snow globe. Many of the snow globe ideas I found were really complicated, but it sparked some ideas of my own!
We headed to the craft store with the goal of picking out things that were lightweight & flat that could go inside of our snow globe. I knew that I wanted to use duct tape for the outline & the base, & that I wanted to use cellophane as the "glass" part of the snow globe. But the rest we figured out once we got to the craft store :)
My favorite part about this project was that my son got to be so involved in both the selection of materials & the creation process. He was able to pick out what he wanted in his snow globe, decorate those objects, & place them where he wanted them. It was fun to hear his ideas & let him run with it a bit!
You can also use this DIY snow globe idea for your own home. Maybe your front door? Maybe your kid's bedroom door? Maybe on the playroom wall? Get creative with it :)
Snow Globe Items:
- Cellophane
- Duct tape (I wanted to do all silver, but my son wanted a red base - he obviously won!)
- White paper
- Snowflake stickers
- Fake snow (I would skip this if we did it again)
- Mini presents
- Mini lights strand
- Christmas tree, penguins, & snowmen (made out of that flat rubbery type material)
- Good quality craft glue
Snow Globe Assembly:
- Draw a pencil outline of your snow globe on your background paper
- Cut out some white paper to look like snow banks
- Arrange your main items where you want them (the tree, penguins, snowmen)
- Glue down the white paper
- Decorate your tree (we simply criss-crossed the mini lights strand across the front of the tree, & taped it from the back to hold them in place)
- Decorate your other items if needed (our penguins & snowmen needed faces drawn on)
- Glue on your tree & other main items (like our penguins & snowmen)
- Use a tape roll to easily stick the presents in a row under the tree
- Place snow stickers inside of your snow globe outline
- Put dabs of glue & sprinkle fake snow on top (this ended up looking pretty cool, but it made a big mess, which is why I'd probably skip this step if we did it again)
- Let any glue spots dry a bit
- Place a piece of cellophane over top of your snow globe outline & trim edges. It doesn't need to be perfect because you will be using wide duct tape to tape it down
- Duct tape around the edges of the top part of your snow globe using small strips at a time to help make it rounded
- Use long strips of duct tape to easily make your base
- And you're done!
If you decide to create a DIY snow globe, we'd love to see it! Tag us on Instagram: @_adore_them_
For more on this topic, check out the full Happy Holidays collection
This post comes from the TODAY Parenting Team community, where all members are welcome to post and discuss parenting solutions. Learn more and join us! Because we're all in this together.


